一直想保留彈性 把動作細節實作成
"某區域內新增一個永久物(這時記載該永久物內容敘述)"
"某區域內移除一個永久物 並且 graveyard/exile zone新增一個永久物"
但邊寫邊覺得這個架構又大又不方便 佔記憶體又恐怖
還是該回頭考慮 先建資料庫導入所有發行牌內容
操作動作時用發行編號來當個體.... 犧牲彈性吧!
2014年10月31日 星期五
2014年10月28日 星期二
自己Build一個kernel給自己用
- 簡易的步驟
http://my.cs.lmu.edu/~tcostell/ubuntu-kernel-howto/ - 後來我跟著這篇作
http://www.ubuntu-tw.org/modules/newbb/viewtopic.php?post_id=172050
10.04之後的版本可能會遇到套件沒有幫你把initramfs跟grub改好
所以你需要mkinitramfs, update-grub
改Blogger的文章中的格式
照著別人文章把以下格式加入版面範本HTML
範本->編輯HTML-> 找到 <b:skin>...</b:skin>, 點擊"..."把他展開, 把以下程式碼加入
使用方式:
code: <code></code> or <div class="code"></div>
quote: <div id="quote"></div>
範本->編輯HTML-> 找到 <b:skin>...</b:skin>, 點擊"..."把他展開, 把以下程式碼加入
code, .code {

display: block; /* fixes a strange ie margin bug */

font-family: Courier New;

font-size: 8pt;

overflow:auto;

background: #f0f0f0 url(http://klcintw.images.googlepages.com/Code_BG.gif) left top repeat-y;

border: 1px solid #ccc;

padding: 10px 10px 10px 21px;

max-height:200px;

line-height: 1.2em;

}


#quote {

display: block; /* fixes a strange ie margin bug */

font-family: Verdana;

font-size: 10pt;

overflow:auto;

background: #f7f7f7 url(https://blogger.googleusercontent.com/img/b/R29vZ2xl/AVvXsEgq3DJOZa2N_X0XyGyxOM7m2eDwGxLIDtAHDKLUx1XfqAQiOKIW_rSDSHGD3BdtnE4fgEZdM2NYGb19tYJeNQeIBYl3w5B7ILxALN2eS-NRd6ksatRJkXMLMdM5dRf2nWOrTlwkjVAoxok/s288/quote-l.gif) left top no-repeat;

border: 4px dotted #ccc;

padding: 15px 15px 15px 31px; /*up right bottom left*/

max-height:300px;

line-height: 1.2em;

}
使用方式:
code: <code></code> or <div class="code"></div>
quote: <div id="quote"></div>
2014年10月24日 星期五
重編ubuntu kernel遇到問題 l pciutils-dev
用git 抓src code回來
照官方步驟 : https://help.ubuntu.com/community/Kernel/Compile
結果出錯fatal error: pci/pci.h: No such file or directory
fatal error: pci/pci.h: No such file or firectory
找到論壇有人提示補安裝套件
apt-get install pciutils-dev
過關.... 正在build
照官方步驟 : https://help.ubuntu.com/community/Kernel/Compile
fakeroot debian/rules clean
AUTOBUILD=1 fakeroot debian/rules binary-debs
結果出錯fatal error: pci/pci.h: No such file or directory
fatal error: pci/pci.h: No such file or firectory
找到論壇有人提示補安裝套件
apt-get install pciutils-dev
過關.... 正在build
2014年10月22日 星期三
2014年10月20日 星期一
難記的縮寫/摻一點難記的東西
EPDC:Electrophoretic Display Controller,
or Electronic Paper Display Controller
IPU:Image Processing Unit [in Freescale]
與Camera, Display相關
VPU:Video Processing Unit [in Freescale]
與視頻播放相關,包括HW codec跟視頻後處理等
VPU is a high performance multi-standard video codec IP that can
perform the H. 264 BP/MP/HP, VC-1 SP/MP/AP, MPEG-4 SP/ASP,
DIVX, MPEG-1/2, RV-8/9/10, and MJPEG decoding and encoding.
GPU:graphics Processing Unit [in Freescale]
與 OpenGL 相關
與 OpenVG 相關
OpenVG(矢量图形算法标准)是一個矢量图形算法库,由Khronos组织开发和管理,与OpenGL有类似的特点,例如跨平台的应用编程接口、支援显示硬件等。但它针对对象和平台便不同了,OpenVG主要针对2D矢量图像如 Flash和SVG 的绘制,而平台方面大多支援智能手机平台、家用游戏和多谋体平台PS3等。
LDB:LVDS Display Bridge
LVDS:Low-Voltage Differential Signal, 低電壓差分訊號, 是一種電子訊號系統
MIPI
http://mipi.org/specifications/display-interface
DBI : Display Bus Interface
DPI : Display Pixel Interface
DSI : Display Serial Interface
AIDL
Android Interface Definition Language
編譯器可以通過aidl檔生成一段代碼,通過預先定義的介面達到兩個進程內部通信進程的目的。
or Electronic Paper Display Controller
IPU:Image Processing Unit [in Freescale]
與Camera, Display相關
VPU:Video Processing Unit [in Freescale]
與視頻播放相關,包括HW codec跟視頻後處理等
VPU is a high performance multi-standard video codec IP that can
perform the H. 264 BP/MP/HP, VC-1 SP/MP/AP, MPEG-4 SP/ASP,
DIVX, MPEG-1/2, RV-8/9/10, and MJPEG decoding and encoding.
GPU:graphics Processing Unit [in Freescale]
與 OpenGL 相關
與 OpenVG 相關
OpenVG(矢量图形算法标准)是一個矢量图形算法库,由Khronos组织开发和管理,与OpenGL有类似的特点,例如跨平台的应用编程接口、支援显示硬件等。但它针对对象和平台便不同了,OpenVG主要针对2D矢量图像如 Flash和SVG 的绘制,而平台方面大多支援智能手机平台、家用游戏和多谋体平台PS3等。
LDB:LVDS Display Bridge
LVDS:Low-Voltage Differential Signal, 低電壓差分訊號, 是一種電子訊號系統
Poky is a reference system of the Yocto Project - a collection of Yocto Project tools and metadata that serves as a set of working examples. To use the Yocto Project tools, you can download Poky and use it to bootstrap your own distribution.
Poky is the platform-independent, cross-compiling integration layer that utilizes OpenEmbedded Core. It provides the mechanism to build and combine thousands of distributed open source projects together to form a fully customizable, complete, coherent Linux software stack.
Poky's objective is to provide all the features and functionalities an embedded developer needs from one solution.
~ https://www.yoctoproject.org/tools-resources/projects/poky
SIMM socket -- single in-line memory module (pic: http://goo.gl/KmznI9)
有30pin 72pin 或是其他特定腳位 ref: http://en.wikipedia.org/wiki/SIMM
SDIO ref: http://wiki.csie.ncku.edu.tw/embedded/SDIO
- SD/MMC, Secure Digital縮寫SD,全名Secure Digital Memory Card
- SD 是一種 flash memory card 的標準,也就是一般常見的 SD 記憶卡,而 MMC 則是較早的一種記憶卡標準,目前已經被 SD 標準所取代.
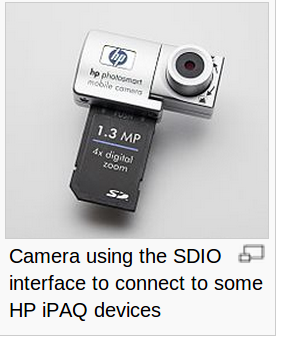
- SD 本來是記憶卡的標準,但是現在也可以把 SD 拿來插上一些週邊介面使用,這樣的技術便是 SDIO。
- 透過 SD 的 I/O 接腳來連接外部週邊,並且透過 SD 上的 I/O 資料接位與這些週邊傳輸資料
- Host devices that support SDIO can use the SD slot to support:
- GPS receivers.
- digital cameras.
- RFID readers.
- FM radio tuners.
- TV tuners.
- Wi-Fi.
- Bluetooth.
Camera with SDIO http://wiki.csie.ncku.edu.tw/sdio1.png
UPIO : user-programmable Input/Output ? user controller parallel Input/Output
UPIO : user-programmable Input/Output ? user controller parallel Input/Output
MIPI
http://mipi.org/specifications/display-interface
DBI : Display Bus Interface
DPI : Display Pixel Interface
DSI : Display Serial Interface
AIDL
Android Interface Definition Language
編譯器可以通過aidl檔生成一段代碼,通過預先定義的介面達到兩個進程內部通信進程的目的。
2014年10月17日 星期五
搞dpkg速記
Maxsolar's Linux Blog: dpkg速記
http://wiki.debian.org.hk/w/Rebuild_dpkg_package
http://wiki.jackslab.org/Debian_基本系统安装关键技术
dpkg-source -x [某套件.dsc] ## 解壓縮套件包
進到該資料夾
debuild -i -uc -us ## debuild 需要 devscripts套件
如此就做出了 某套件.deb
若要在debuild之前先對原始碼做修改
改完之後需要做 dpkg-source --commit 對改動區域留下紀錄
debuild才不會阻止你製作deb包
還有更多維護與製作deb包的注意事項..... 大家加油 我到這裡就好
2014年10月16日 星期四
第二篇ubuntu筆記 改天再考慮併回去
套件重新安裝
apt-get install --reinstall [套件]或是 :
dpkg -L [套件]
less /var/lib/dpkg/info/[套件].list
套件完整移除
apt-get remove --purge [套件] [套件] [套件] ...可以查你裝過哪些套件
ls /var/lib/dpkg/info/***
套件鎖定版本
- echo "gaim hold" | dpkg --set-selections # 將 gaim 鎖定版本
dpkg --get-selections "gaim" # 檢查: 出現 gaim hold # 狀態是 hold, 就不能被升級了. - vim /etc/apt/preferences # 內容如下, 把版本編號寫死.
- Package: gaim
- Pin: version 0.58*
套件解除鎖定
- echo "gaim install" | dpkg --set-selections
- dpkg --get-selections "gaim" # 檢查: 出現 gaim install # 狀態被重置為 install, 就可以繼續升級了
狀態檔案位置
- hold / install 這些狀態標誌都寫在 /var/lib/dpkg/status 裡, 也可以手動去修改變 hold / install 等狀態.
其它相關
- apt-get clean #/var/cache/apt/archives 會清掉 *.deb 檔
- apt-get update # 會更新 /var/lib/apt/lists 的資料
用命令播放影片音樂
讓系統自己尋找可能的 codec
gst-launch playbin2 uri=file:///[檔案]
指定codec
gst-launch filesrc location=[檔案] typefind=true ! aiurdemux name=demux demux. ! queue max-size-time=0 ! vpudec ! mfw_v4lsink demux. ! queue max-size-buffers=0 max-size-time=0 ! beepdec ! audioconvert ! 'audio/x-raw-int, channels=2' ! alsasink
畫面only, no sound
no vpu involved
gst-launch filesrc location=/home/linaro/1.mp4 typefind=true ! aiurdemux name=demux demux. ! queue max-size-time=0 ! ffdec_h264 ! mfw_v4lsink demux. ! queue max-size-buffers=0 max-size-time=0 ! beepdec ! audioconvert ! 'audio/x-raw-int, channels=2' ! alsasink
確認gstreamer裝了哪些plugin
gst-inspect
用命令叫totem播放影片音樂
export DISPLAY=:0
讓系統自己尋找可能的 codec
gst-launch playbin2 uri=file:///[檔案]
指定codec
gst-launch filesrc location=[檔案] typefind=true ! aiurdemux name=demux demux. ! queue max-size-time=0 ! vpudec ! mfw_v4lsink demux. ! queue max-size-buffers=0 max-size-time=0 ! beepdec ! audioconvert ! 'audio/x-raw-int, channels=2' ! alsasink
畫面only, no sound
gst-launch filesrc location=/home/linaro/1.mp4 typefind=true ! aiurdemux ! queue max-size-time=0 ! vpudec ! mfw_v4lsink
no vpu involved
gst-launch filesrc location=/home/linaro/1.mp4 typefind=true ! aiurdemux name=demux demux. ! queue max-size-time=0 ! ffdec_h264 ! mfw_v4lsink demux. ! queue max-size-buffers=0 max-size-time=0 ! beepdec ! audioconvert ! 'audio/x-raw-int, channels=2' ! alsasink
確認gstreamer裝了哪些plugin
gst-inspect
用命令叫totem播放影片音樂
export DISPLAY=:0
totem [檔案]
用命令放長音
speaker-test -t sine -f 1000 # 用sine波形 放1k的音
speaker-test -t sine -f 1000 # 用sine波形 放1k的音
使用 Totem 播放影片
1. sudo apt-get install totem-xine w32codecs
2. vim ~/.gnome2/Totem/xine_config
3. 找出 [decoder.external.real_codecs_path] [decoder.external.win32_codecs_path], 改成 [/usr/lib/w32]
shell裡的for in loop
for N in {0..10}
do grep -r [keyword] temp$N/
done
會在temp0 , temp1 , temp2 , ... temp10的資料夾裡grep [keyword]
{0..10}
可以換成0 1 2 3 4 5 6 7 8 9 10
也可以用*
for N in temp*/ ; do grep -r [keyword] $n/ ; done
會在temp*裡面找
SpeechSynthesis
shell裡的if ... else ...寫法
http://rickyju.pixnet.net/blog/post/33210112-shell-script-%3A-if-%E6%A2%9D%E4%BB%B6%E5%BC%8Fshell重覆送出adb shell reboot
for i in `seq 0 0.5 1000`;do adb shell reboot; sleep 50; done
SpeechSynthesis
ubuntu開關機時有個沒啥用的service speech-dispatcher佔時間
很多人在網路上問這是做啥的, 是個speech synthesis套件 語音合成用
沒機會用....關了他吧
sudo update-rc.d -f speech-dispatcher remove
看看你用啥driver顯示
lshs -c video
找到driver=
Shell 指令小撇步
一次要送好幾個連續指令時可以用 分號(;)或 &&
這兩種方法效果不同:
http://www.linuxquestions.org/questions/programming-9/bash-shell-and-and-and-%3B-699111/
設定 setuid bit
看看你用啥driver顯示
lshs -c video
找到driver=
Shell 指令小撇步
一次要送好幾個連續指令時可以用 分號(;)或 &&
這兩種方法效果不同:
No, they are not quite the same. With &&, the second command will only run if the first command finishes successfully, that is if it sends an exit code of 0. But with the semicolon, the second command will start right after the first one finishes, no matter whether it succeeds or not.
There's also ||, the "or" operator, where the second command will only run if the first one fails in some way (exit code is not 0; the command exited with an error).
There's also ||, the "or" operator, where the second command will only run if the first one fails in some way (exit code is not 0; the command exited with an error).
http://www.linuxquestions.org/questions/programming-9/bash-shell-and-and-and-%3B-699111/
設定 setuid bit
$ sudo su

sudo: must be setuid root
build code的時候有時會碰到
解法
# chwon root:root /usr/bin/sudo

# chmod 4755 /usr/bin/sudo

# reboot
新增一個檔案, 大小隨你決定
(ref. http://stackoverflow.com/questions/139261/how-to-create-a-file-with-a-given-size-in-linux )
最簡單的指令名字: dd
dd if=/dev/zero of=upload_test bs=file_size count=1但dd有 4GB值上限,且作大檔時速度慢
延展/截斷檔案的工具: truncate
truncate -s 10G foo
Terminal中用組合鍵捲動畫面
[Shift]+[PgUp]/[PgDn] 上下頁
如果是GUI裡虛擬的terminal, 還有一個捲動方式
[Ctrl]+[Shift]+[↑][↓] 上下行
日期表示法
$(date +%N)
gsettings set org.gnome.desktop.media-handling automount false
日期表示法
$(date +%N)
gsettings set org.gnome.desktop.media-handling automount false
2014年10月3日 星期五
玩弄過(linux)必留下痕跡 -- 如果你用了git, svn等版本控制工具
在修改開發linux kernel時 , 如果在看到kernel version name多出了 -dirty 字眼 ,
表示你可能有使用git, svn之類的工具 ; make kernel時他很貼心的檢查到了, 就自動做了記號提醒你
不想看到dirty :
開關 CONFIG_LOCALVERSION_AUTO 選項, 關掉就不會加dirty
但是他會加一個 + ; 還是有痕跡
想擦乾淨指紋?
打開~/script/setlocalversion 研究一下最後一段的字串組成
編譯時指定LOCALVERSION="" 強制組合出你想要的字串給他
表示你可能有使用git, svn之類的工具 ; make kernel時他很貼心的檢查到了, 就自動做了記號提醒你
不想看到dirty :
開關 CONFIG_LOCALVERSION_AUTO 選項, 關掉就不會加dirty
但是他會加一個 + ; 還是有痕跡
想擦乾淨指紋?
打開~/script/setlocalversion 研究一下最後一段的字串組成
編譯時指定LOCALVERSION="" 強制組合出你想要的字串給他
利用Windows7 [Microsoft Virtual WiFi Miniport Adapter]介面 , 虛擬出無線ap 筆記本電腦啟用虛擬wifi共享上網(圖文介紹)
參考 http://mobile.game2.tw/win7筆記本電腦啟用虛擬wifi共享上網(圖文介紹)#.VC4djPmSxjI
我的電腦有連乙太網路 要如何虛擬出wifi ap給你的其他行動裝置呢?
我的電腦有連乙太網路 要如何虛擬出wifi ap給你的其他行動裝置呢?
在裡面下這個指令
「netsh wlan set hostednetwork mode=allow ssid=你要的名稱 key=密碼」
設定好主控網路的設定
然後用這個指令開啟
「netsh wlan start hostednetwork」
/ 不喜歡就用這個指令關閉
「netsh wlan stop hostednetwork」
打開網路和共用中心看看
打開網路和共用中心看看

綠框就是新加的虛擬網路ap裝置
接下來把紅框的[內容]打開來
設定成這樣

紅框你自己指向你的虛擬網路ap裝置名
確定後 ap端就設好了
連線端跟一般wifi連線方式一樣
---------------------------------------------------------------------------------------------------------
每次遠離訊號範圍後回來他都連不上
我得stop hostednetwork ; start hostednetwork
停用無線裝置 ; 啟用無線裝置
手機才自動重新連上
每次遠離訊號範圍後回來他都連不上
我得stop hostednetwork ; start hostednetwork
停用無線裝置 ; 啟用無線裝置
手機才自動重新連上
2014年10月2日 星期四
2012 ARM發表ARMv8架構, 開始支援64bit 定址 (Cortex-A50家族)
Current cores from ARM Holdings support a 32-bit address space and 32-bit arithmetic;
the ARMv8-A architecture, announced in October 2011,[6] adds support for a 64-bit address space and 64-bit arithmetic
http://www.techbang.com/posts/12224-arm-of-the-64-bit-revolution-resolution
the ARMv8-A architecture, announced in October 2011,[6] adds support for a 64-bit address space and 64-bit arithmetic
http://www.techbang.com/posts/12224-arm-of-the-64-bit-revolution-resolution
[X] armlinux中一些重要的宏及地址定义
http://biancheng.dnbcw.info/linux/352414.html
TEXT_OFFSET 内核在RAM中的起始位置相对于RAM起始地址偏移。值为0x00008000
./arch/arm/Makefile
118 textofs-y := 0x00008000
222 TEXT_OFFSET := $(textofs-y)
PAGE_OFFSE 内核镜像起始虚拟地址。值为0xC0000000
/arch/arm/configs/s3c2410_defconfig
CONFIG_PAGE_OFFSET=0xC0000000
./arch/arm/include/asm/memory.h
34 #define PAGE_OFFSET UL(CONFIG_PAGE_OFFSET)
PHYS_OFFSET RAM启始物理地址,对于2410来说值为0x30000000,RAM接在片选6上
arch/arm/mach-s3c2410/include/mach/memory.h
from arch/arm/mach-rpc/include/mach/memory.h
#define PHYS_OFFSET UL(0x30000000)
KERNEL_RAM_VADDR 内核在RAM中的虚拟地址。值为0xC0008000
KERNEL_RAM_PADDR 内核在RAM中的物理地址。值为0x30008000
arch/arm/kernel/head.S
29 #define KERNEL_RAM_VADDR (PAGE_OFFSET + TEXT_OFFSET)
30 #define KERNEL_RAM_PADDR (PHYS_OFFSET + TEXT_OFFSET)
swapper_pg_dir 初始页表虚拟地址,值为0xC0004000,一般分配KERNEL_RAM_VADDR地址下16K作为页表,因此,我们必须确保正确设置KERNEL_RAM_VADDR。
arch/arm/kernel/head.S
44 .globl swapper_pg_dir
45 .equ swapper_pg_dir, KERNEL_RAM_VADDR - 0x4000
VMALLOC_START 0xc4800000
VMALLOC_END 0xe0000000
MODULES_VADDR 0xbf000000
MODULES_END 0xc0000000
./arch/arm/include/asm/memory.h
51 #define MODULES_VADDR (PAGE_OFFSET - 8*1024*1024)
61 #ifdef CONFIG_HIGHMEM
62 #define MODULES_END (PAGE_OFFSET - PMD_SIZE)
63 #else
64 #define MODULES_END (PAGE_OFFSET)
65 #endif
arch/arm/include/asm/highmem.h:6:#define PKMAP_BASE (PAGE_OFFSET - PMD_SIZE)
./arch/arm/include/asm/memory.h
34 #define PAGE_OFFSET UL(CONFIG_PAGE_OFFSET)
35 #define TASK_SIZE (UL(CONFIG_PAGE_OFFSET) - UL(0x01000000))
36 #define TASK_UNMAPPED_BASE (UL(CONFIG_PAGE_OFFSET) / 3)
135 /*
136 * Physical vs virtual RAM address space conversion. These are
137 * private definitions which should NOT be used outside memory.h
138 * files. Use virt_to_phys/phys_to_virt/__pa/__va instead.
139 */
140 #ifndef __virt_to_phys
141 #define __virt_to_phys(x) ((x) - PAGE_OFFSET + PHYS_OFFSET)
142 #define __phys_to_virt(x) ((x) - PHYS_OFFSET + PAGE_OFFSET)
143 #endif
144
145 /*
146 * Convert a physical address to a Page Frame Number and back
147 */
148 #define __phys_to_pfn(paddr) ((paddr) >> PAGE_SHIFT)
149 #define __pfn_to_phys(pfn) ((pfn) << PAGE_SHIFT)
150
151 /*
152 * Convert a page to/from a physical address
153 */
154 #define page_to_phys(page) (__pfn_to_phys(page_to_pfn(page)))
155 #define phys_to_page(phys) (pfn_to_page(__phys_to_pfn(phys)))
201 /*
202 * Drivers should NOT use these either.
203 */
204 #define __pa(x) __virt_to_phys((unsigned long)(x))
205 #define __va(x) ((void *)__phys_to_virt((unsigned long)(x)))
206 #define pfn_to_kaddr(pfn) __va((pfn) << PAGE_SHIFT)
207
208 /*
209 * Virtual <-> DMA view memory address translations
210 * Again, these are *only* valid on the kernel direct mapped RAM
211 * memory. Use of these is *deprecated* (and that doesn't mean
212 * use the __ prefixed forms instead.) See dma-mapping.h.
213 */
214 #ifndef __virt_to_bus
215 #define __virt_to_bus __virt_to_phys
216 #define __bus_to_virt __phys_to_virt
217 #define __pfn_to_bus(x) __pfn_to_phys(x)
218 #define __bus_to_pfn(x) __phys_to_pfn(x)
219 #endif
訂閱:
文章 (Atom)